Tutoriel : Montage du Kit Stage 3 K04 APR sur Golf 6 Gti 211cv
Voici un tuto complet trouvé sur un forum Us sur l’installation d’un turbo K04 APR sur Golf 6 GTI
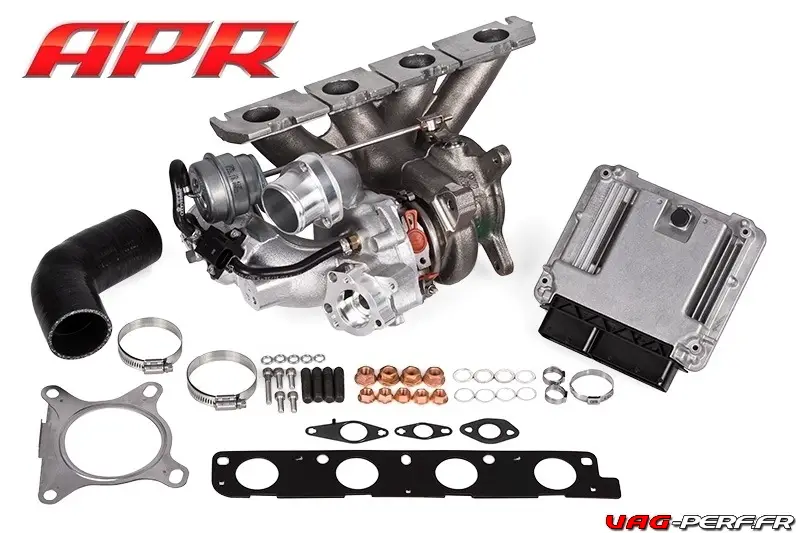
APR propose des kits plug and play pour de nombreux moteurs de la gamme VW. Ici, on va se pencher sur le moteur 211cv de la Golf 6 Gti, sur laquelle on va installer un KIT K04 que la marque propose. C’est plug and play mais il faut quand même suivre certaines étapes importantes pour que cela soit bien effectué.
Quelques liens pour vous aider à préparer l’installation
Printable PDF Version here: http://blogvager.files.wordpress.com…tallation1.pdf
Please refer top this thread as well: http://www.golfmkv.com/forums/showthread.php?t=140633
Another good reference, but its an FSI engine: http://www.stasisengineering.com/sit…20V%20rev9.pdf
Liste des véhicules compatibles :
| Audi | A3 (MK2) |
| Audi | Q3 |
| Audi | TT (MK2) |
| Volkswagen | Beetle |
| Volkswagen | CC |
| Volkswagen | Eos |
| Volkswagen | Golf / GTI (MK5 / MK6) |
| Volkswagen | Jetta / GLI / Bora / Vento / Sigitar (MK5 / MK6) |
| Volkswagen | Passat / Magaton (B6) |
| Volkswagen | Scirocco |
| Volkswagen | Tiguan |
| Seat | Altea |
| Seat | Leon (MK2) |
| Seat | Toledo (MK2) |
| Skoda | Octavia / VRS (MK2) |
| Skoda | Superb (B6) |
| Skoda | Yeti |
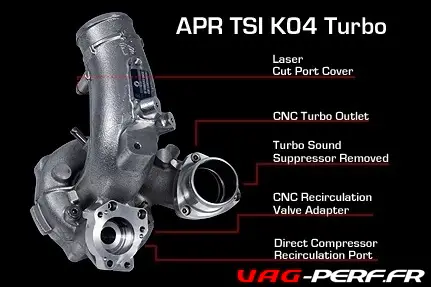
Détails sur le Turbo
Liste des moteurs compatibles
| CAWA | 2.0T EA888 Gen 1 | Transverse |
| CAWB | 2.0T EA888 Gen 1 | Transverse |
| CBFA | 2.0T EA888 Gen 1 | Transverse |
| CCTA | 2.0T EA888 Gen 1 | Transverse |
| CCTB | 2.0T EA888 Gen 1 | Transverse |
| CCZA | 2.0T EA888 Gen 1 | Transverse |
| CCZB | 2.0T EA888 Gen 1 | Transverse |
| CCZC | 2.0T EA888 Gen 1 | Transverse |
| CCZD | 2.0T EA888 Gen 1 | Transverse |
Liste des pré requis pour cette installation
- Descente de Turbo obligatoire
- Admission : Type APR Carbonio ou VWR (Stage 1 ou stage 2)
- Intercooler minium S3 ou équivalant comme le APR ou encore le Wagner
Attention, il faut prévoir de l’huile neuve puisqu’on va changer le turbo. Pensez à vous en procurer 5 litres plus un petit bidon d’un litre. Aussi prévoir le filtre à huile 😉
Prévoir également des bougies neuves : NGK BKR8EIX
Je reprends un tuto trouvé au US que j’ai partiellement traduit pour le moment
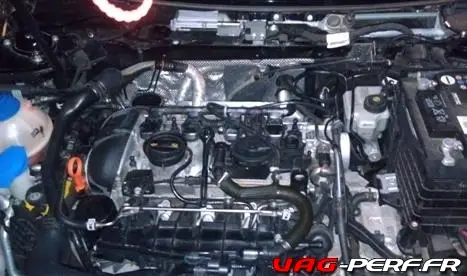
Préparation de la voiture à l’installation du nouveau Turbo.
- Lever la voiture, pas trop haut ou sinon vous ne pourrez pas avoir une bonne position et bonjour le mal de dos.
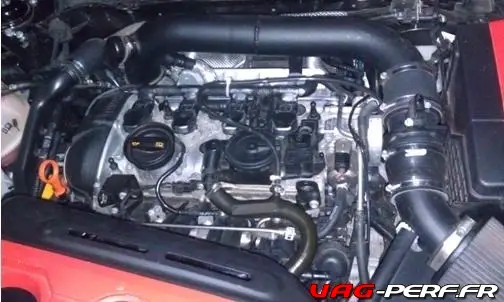
- Ensuite, retirez le cache moteur.
- Purgez l’huile, et retirez le filtre à huile.
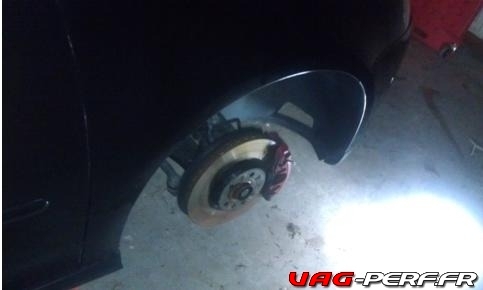
- Retirez la roue coté passager afin d’avoir un meilleur accès
- Retirez ensuite l’admission
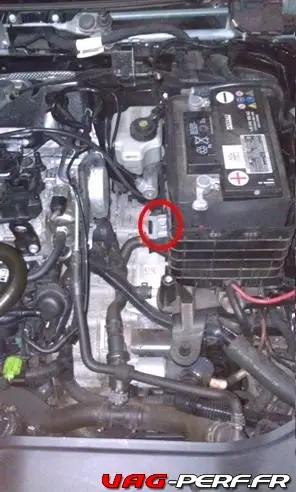
- Déconnectez la batterie
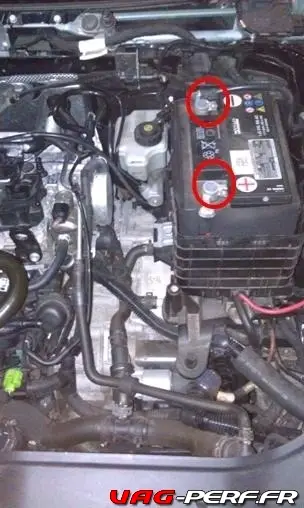
- Puis retirez la batterie totalement
- Ensuite on va retirer le passage de roues afin d’accéder aux durites avec du T25)
Pensez a bien garder la visserie retirée et identifiez la dans des petits sacs par exemple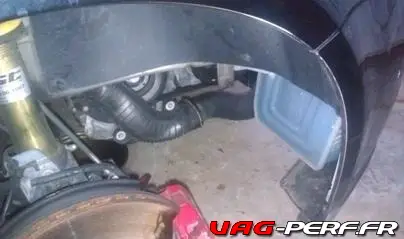
- Retirez ensuite le pare chaleur du turbo.
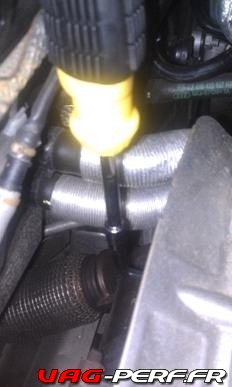
- Du coté conducteur, retrier la visse ALLEN 6MM située derrière le pare chaleur
- Ensuite, on va retirer les deux écrous M10 qui tiennent le pare chaleur
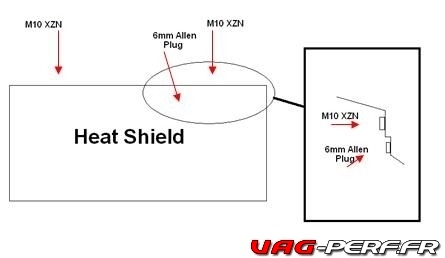
- Retirer (M8 XZN) boulon sur le dessus du bouclier thermique qui détient diverses lignes et les tubes d’admission de montage. (Attention, il ya un écrou dessous)
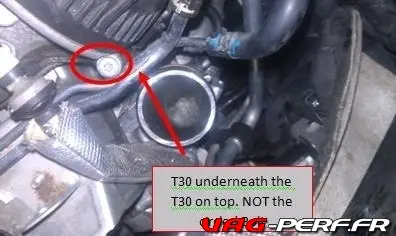
- Retirer (2 x T30) boulons tenant les multiples lignes à la
Bloc. L’un est situé sur le côté du conducteur par la pompe à carburant et le
autre par l’entrée du turbo sur le bloc.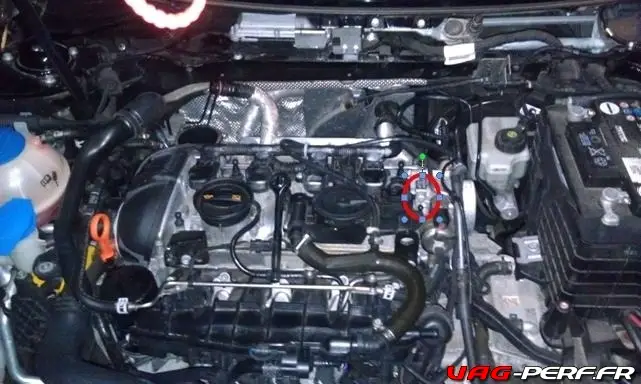
- Déclipser la Ligne de dépression / de vide et la retirer du bloc
- Déplacez lignes haut et loin de l’écran thermique sur le dessus du bloc. Je ai utilisé une attache de tenir ces dos. Enlevez le bouclier thermique
- Du coté conducteur, retrier la visse ALLEN 6MM située derrière le pare chaleur
- Retirez Tuyeau: car si il ya beaucoup de discussions sur ce, je
sera toujours comprendre les étapes. S’il vous plaît se référer à ce fil faite par Plac:
http://www.golfmk6.com/forums/showthread.php?t=25392Retirer passager plateau de soubassement latéral (T25)
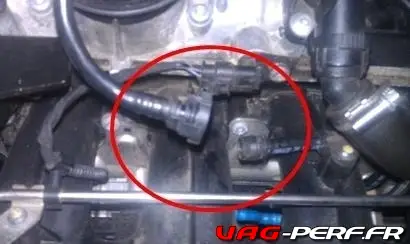
Tirez capteur O2 hors du support de goujon soubassement
Débranchez harnais du support (Cela vous aidera plus tard à la désinstallation / installation)
Retirer de la Croix-membre, les supports (13mm)
Desserrer le collier manches de CBE (16mm)
Enlevez le bouclier thermique CV (16mm extrémité ouverte)
Retirer les écrous de bride DP: Tricky, mais faisable. (16mm et PB Blaster) Cependant, votre kit comprend goujons et écrous, de sorte que vous ne devriez pas avoir à vous soucier de la facilité de désinstallation
Retirer Tuyeau Bracket (13mm)
Retirer DP
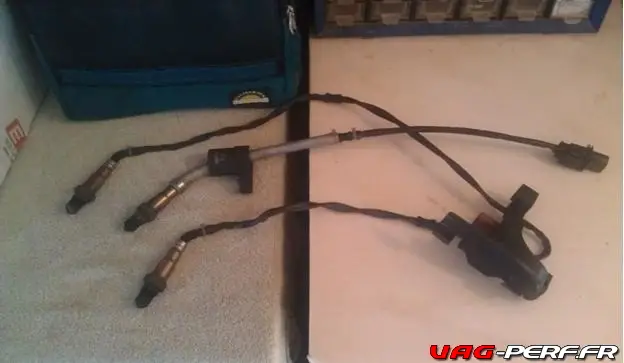
Échanger O2 Capteurs à ce moment de votre nouveau DP OEM (ou pas, si vous utilisez du matériel disponible) (22mm ou 7/8 « Combination Wrench
)
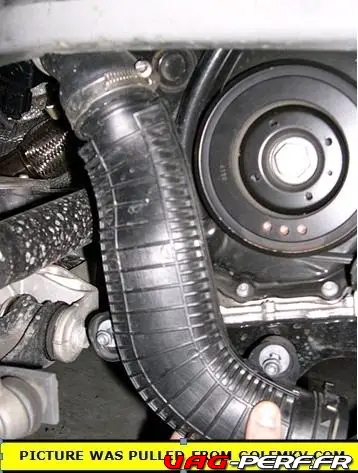
- Remove Pancake Pipe (2 x T30) Undo Hose Clamps and the two bolts holding it to the block
- Disconnect DV and N75 Connectors. Its best to push IN the connector then pull the tab, that way the pressure can be lifted off the tab.
- Cover Front Sub-frame with towel. I managed to drop a few washers and tool bits in there and had to fish them out with my magnetic hook. Pain in the ass.
Time: 2.25 Hours
Turbo Removal
Time to remove the turbo and all of its components. It would probably be
a good time to take a small break and grab a coke. This next part is
tricky and time consuming. Having a friend would help, but I did it by
myself so it wasn’t impossible. Plus, there is really only room for one
hand
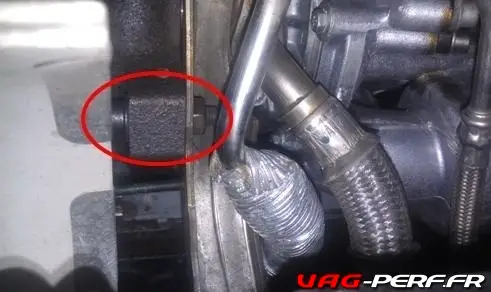
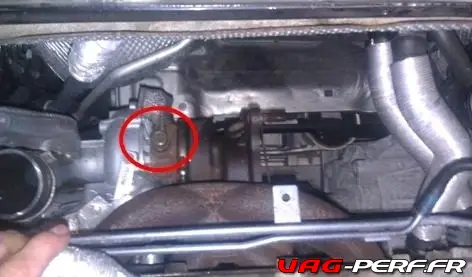
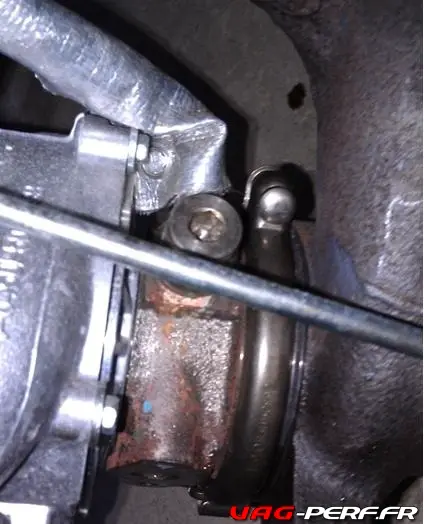
- Remove the Turbo Support bracket: (2 x M10 XZN) Rear bolt is EXTREMELY close to the axle, you might need to have short (M10 XZN) to access this. I used the XZN bits from AutoZone cut off and (1/2” Combination Wrench
- Remove upper section of turbo support bracket: (6mm Allen) Place bracket to the side. Nut is welded on, so don’t worry about it falling
- .
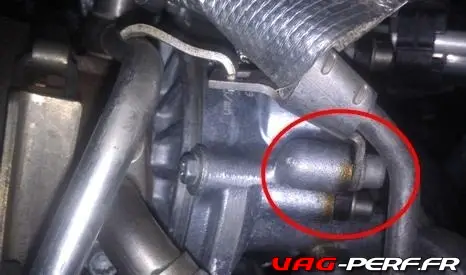
- Remove Coolant Return at the Turbo: (Short M12 XZN + 1/2” Combination Wrench) Just like the turbo support bracket, you should have plenty of clearance.
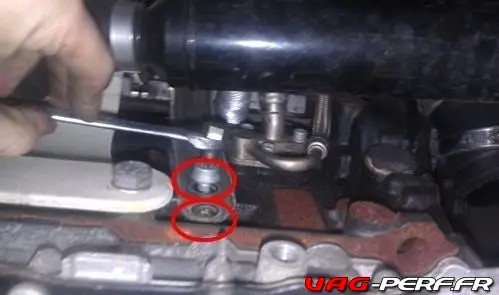
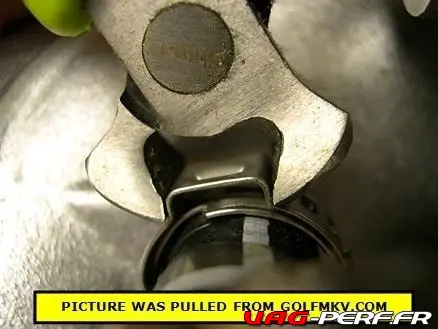
- Disconnect Oil Return on the bottom of the turbo: (2 x M8 XZN)
The picture isn’t very good, but you WILL be able to reach it. It might
benefit to have a longer M8 XZN. The view is looking UP from underneath
on your back after you have rolled in from the front of the car.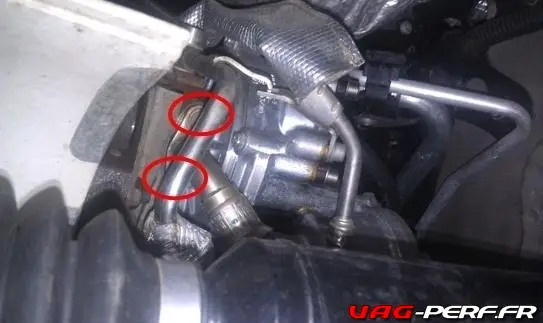
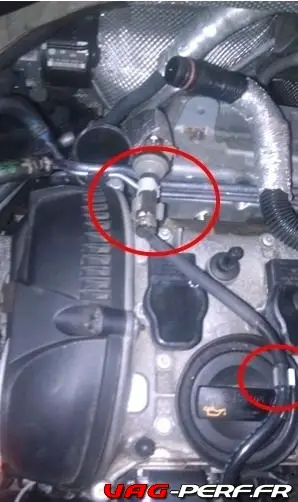
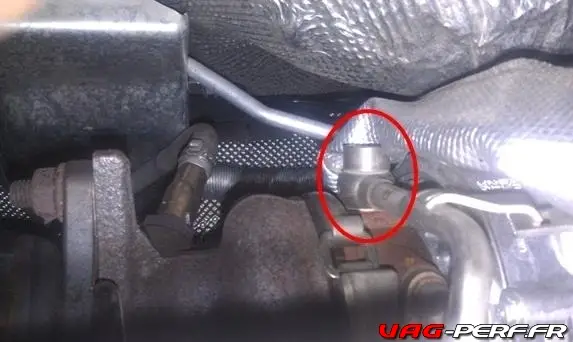
- Remove Oil Supply Line Bracket Under DV: (M8 XZN)
- Disconnect Coil Packs and route harness to the other side of the engine bay
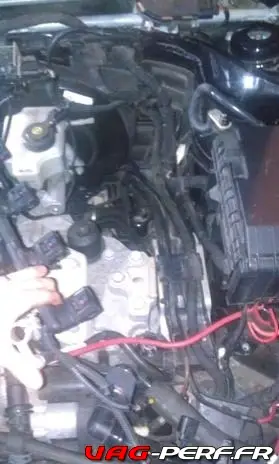
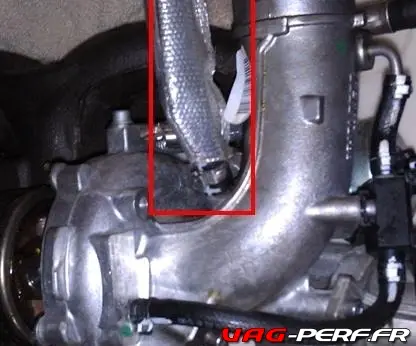
- Disconnect Oil Supply Line on top of the turbo (M12 XZN): Push to the back and out of the way
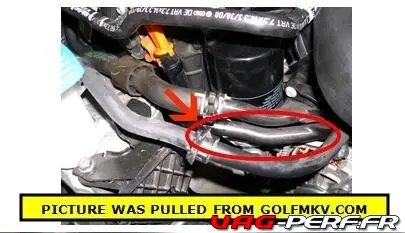
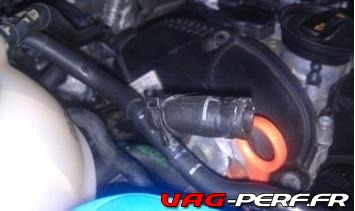
- Disconnect Coolant Supply Hose (Channel Locks or Vice Grips): Just undo the clip and pull the hose off the hard piping. Route it out of the way.
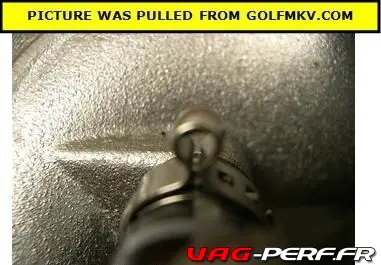
- Remove Turbo (5 x 13mm) Nuts: Some studs might come out, just be sure to chuck these up and remove the nuts and place them back into the block. None of my studs came out and I have around 40K on my vehicle. Picture is from the backside of the manifold
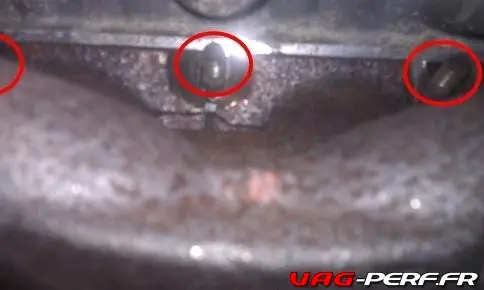
- To lift the turbo out, pull manifold away from block studs and angle the turbine side upward and wiggle it out of the top. It took me a little bit, but I found the compressor outlet was hitting the block. Once I got it free from the block, the turbo was MUCH easier pulling out
from the top
.
Information logiciel VCDS et câble VAG COM
Pour être utilisé sur votre PC, le logiciel VCDS doit être utilisé avec un câble VAGCOM.
Pensez à toujours bien ranger votre câble.
Si vous êtes à la recherche d'un Câble VAGCOM ou encore d'un lecteur de code défaut, je vous recommande en ce moment les modules OBDEleven, surtout dans la version PRO :
- Lecteur de code défaut
- Application mobile (pas besoin de PC)
- Activation de nombreuses fonctions cachées en version OneClick ( bien plus simple que le VCDS !
| Aperçu | Produit | Prix | |
|---|---|---|---|

|
OBDeleven NexGen Pro Pack Ultimate Bluetooth OBD2 Diagnostic Code Reader Car Scanner for Daily and... |
133,92 EUR |
Acheter sur Amazon |
Ensuite, si vous souhaitez simple lecteur de code défaut, voici un petit module offrant un très bon rapport qualité prix :
| Aperçu | Produit | Prix | |
|---|---|---|---|

|
OBD2 Bluetooth + Support Francais 7/7J - Diagnostic des Codes Moteur en 3 Min ! Valise de Diagnostic... | 25,99 EUR | Acheter sur Amazon |
Time: 1.5 Hours
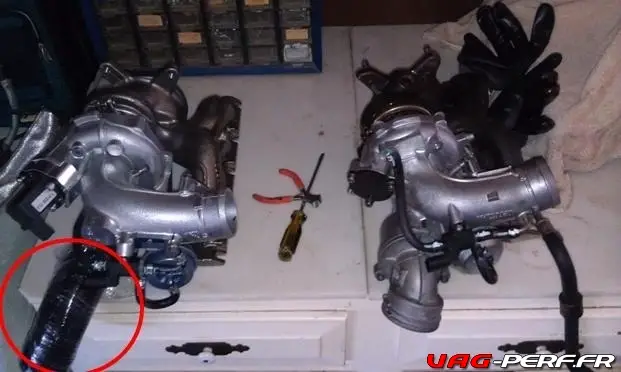
Bench Work: Swapping IHI to K04
Awesome Job. Now that you have the turbo out, pat yourself on the back and take another break, or continue on. The rest is simple, but you must make sure you are aware of what you’re doing, because you could be in for a headache if you mess something up.
- Assemble DV (Purchase a REV D valve!) to K04 per APR’s instructions (3 x 5mm allen + lock washers). Make sure they’re snug
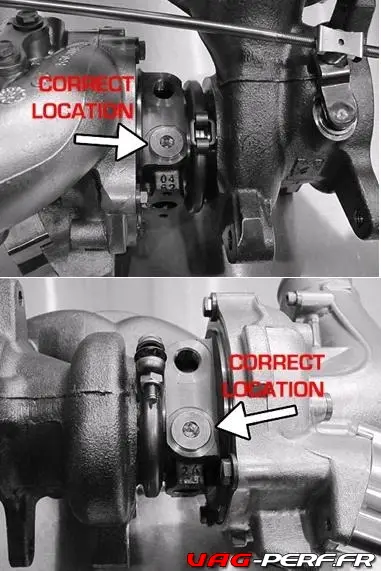
- Swap (6mm Allen) Coolant Plug per APR’s instructions. Torque to 38-40ft-lbs. Plug Location was triple confirmed by APR’s service department
- Swap Coolant Supply line from IHI to K04. BE SURE to follow APR’s instructions for washer placement. DO NOT put the thicker washer on the coolant line you are currently swapping. This washer is for the firewall
side line. I made the mistake and reinstalled everything and had to pull the turbo a second time to swap them out. Torque to 20NM (18.5ft-lbs) + 45* (You will not be using the 8XZN bolt from the bracket.)
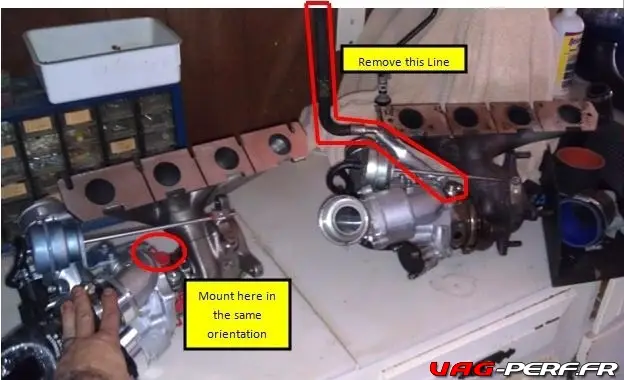
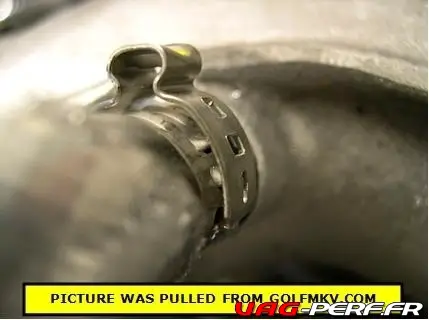
- Swap Vacuum Line from IHI to K04. Be sure to use Oetiker clamps provided. (I used a small pair of nippers to clamp). The line had a little play in it so I wrapped some high temp electrical tape around it to provide adequate clamping force. That might not be needed for other
installs
- Install Downpipe Studs provided in the kit. Be sure the smaller end is installed into the flange. Don’t destroy the threads, but make sure they’re snug. You will torque these later
- Install APR Supplier Silicone Connector at the same angle as the Stock Turbo’s compressor outlet. This will help later.
Time: 45mins
Informations et Rappels VCDS et VAGCOM
Pour pouvoir utiliser les codages VAGCOM présentés, vous devez si possible avoir votre VCDS à jour.
Vous pouvez consulter ce Tutoriel d'installation vous y trouverez toutes les informations et instructions afin d'installer le logiciel VCDS sur votre PC sous Windows 10.
Faites toujours attention également de sauvegarder les codages d'origine effectués.
Re-installation du nouveau Turbo
Now you’re ready for the full install. Make sure the engine bay is free
from wires, connectors, lines, etc. etc. You’ll need as much clearance
as you can and plenty of hand room. I have smaller hands and I don’t
know the variation between big hands and small hands when installing the
turbo. No pictures will be provided for reinstallation of everything.
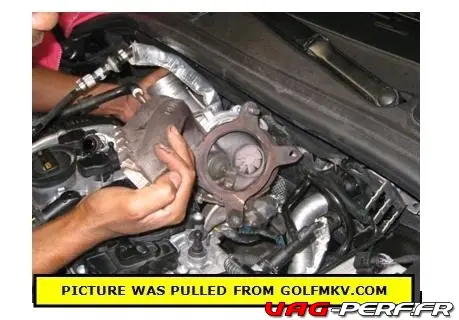
- Install K04. It would be wise to angle the compressor down first for easier fitment. Make sure you’re aware of the silicone adapter. You might need to go underneath and guide it away from the block. Once that is situated the turbo should just slide into place. Make sure you place the turbo into the Vblocks on the engine. Basically when I was aligning the holes to their studs, the manifold sort of slipped into the blocks naturally. Be sure in install the gasket the same orientation as the IHI(Tab faces driver’s side)
- Hand tighten manifold nuts on the studs
- Taken from GolfMKV: “When torque-ing the turbo to the head, there is a very specific sequence to follow. Let’s label the nuts 1 thru 5, starting from the passenger side. The sequence to tighten them is: 1, 3,5, 4, 2. You have to make five passes in that exact sequence. The firstfour passes will increase torque each time, starting with 5 Nm, 12 Nm, 16 Nm, and then 25 Nm. The fifth pass should be made at 25 Nm again,to verify nothing has changed. If you get any rotation on the fifth pass, make another at 25 Nm until the nuts don’t rotate.” I believe thisis the Service Manual process. (13mm)
Install Oil Feed line to the top of the turbo. Don’t forget to use new washers on either side of the banjo bolt. (M12 XZN) (20NM + 45*) - Install Oil Return Line. Don’t forget to use the new gasket. (2 x M8 XZN) (Torque: 9NM)
- Install Coolant Return Line. Don’t forget to use new ashers on either side of the banjo bolt. (Short M12 XZN + 1/2” Combination Wrench) Tighten the bolt well.
- Install Coolant Feed Line onto the hard piping to the left of the block. I would make sure the clip is facing in a convenient location
- Install Turbo Support Bracket
- Install Pancake Pipe
- Reinstall Heat shield
- Install vacuum line to block
- Install lines onto heat shield
- Connect DV and N75 connectors
- DO NOT CONNECT COIL PACKS YET
- Install downpipe per APR’s directions (or other vendor)
- Install splash shield
- Install battery
- Install Intake
- Install Battery (tie down and connectors)
- Install Passenger Fender liner
- Install Passenger Wheel (90ft-lbs)
- Check work and make sure everything is snugged up
- Fill Oil
- Check EVERYTHING again
- With the coil packs still unset, turn the engine over to allow the oil to recirculate into the turbo and throughout the system for about 30secs. Since the coil packs aren’t connected, no spark will be delivered to the chamber and the system will not turn over.
- Connect coil packs
- Leave ECU in stock mode and crank the car up. Let the car idle and run for a few minutes
- Check for Leaks
- Shut the car off and fill 50/50 Mix of coolant to appropriate level.
- Go for a test drive. Do not go crazy. You’re basically just checking whether or not you broke something or you missed installing a part.
- Check for leaks again
- Troubleshoot if needed
- Reinstall engine cover
- Place your ECU in tune mode and go have fun!!
TIME: 3.5 Hours
Ideal FULL PROJECT TIME: 9 Hours
Realistic FULL PROJECT TIME: 2 x 12 Hour days. I ran into some issues but would suggest 2 full days for this.
DISCLAIMER: I’m in no way responsible for any issues you run into modding your car. Work on your car at your own RISK. PM if needed. I will be happy to answer questions. Also, for a second DIY to look at, check: http://www.golfmkv.com/forums/showthread.php?t=140633
Les commentaires sont fermés